Posted on

Outside space matters more

white dining table on fake grass

Outside space matters more

With the average British home shrinking by two square metres in a decade, families are forced to make their living space stretch more than ever. Despite the lack of indoor space, 80% of new homes bought in the past five years have a private garden. This makes outdoor space extremely valuable. Exterior spaces have now evolved to be an expansion of indoor living space. Many homeowners see their garden as a key entertainment space; doubling up as al fresco dining rooms, bars and even cooking spaces. Make sure you get the most of your space with our planning and design tips:

vibrant fake grass laid on balcony with view of farm land

Match your lifestyle.


If you want to make the most of your outdoor space, but don’t have a lot of time for gardening, go low maintenance.

Adding paving and decking gives you a great space for seating and furniture which can be a great dining and entertainment area.

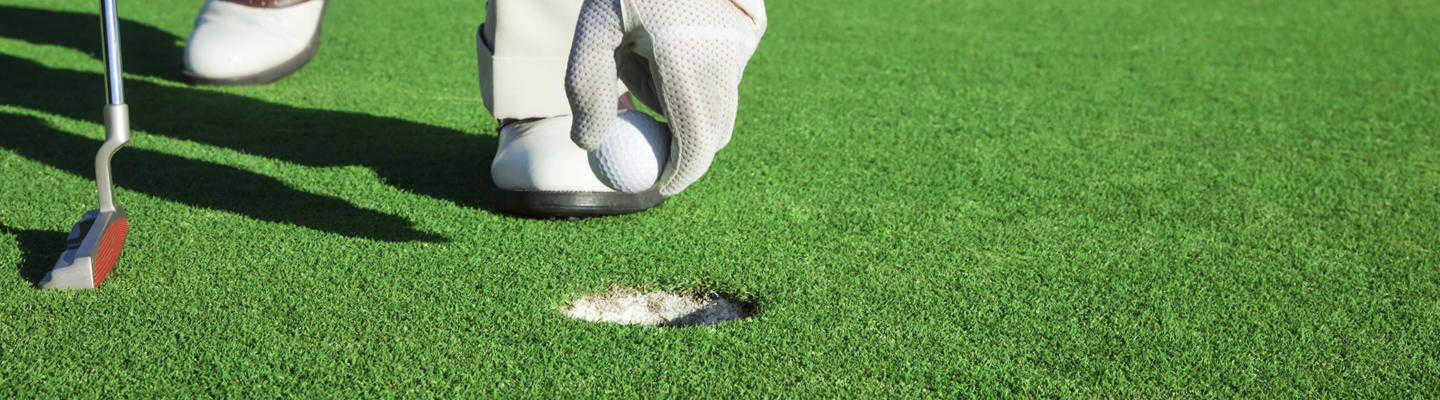
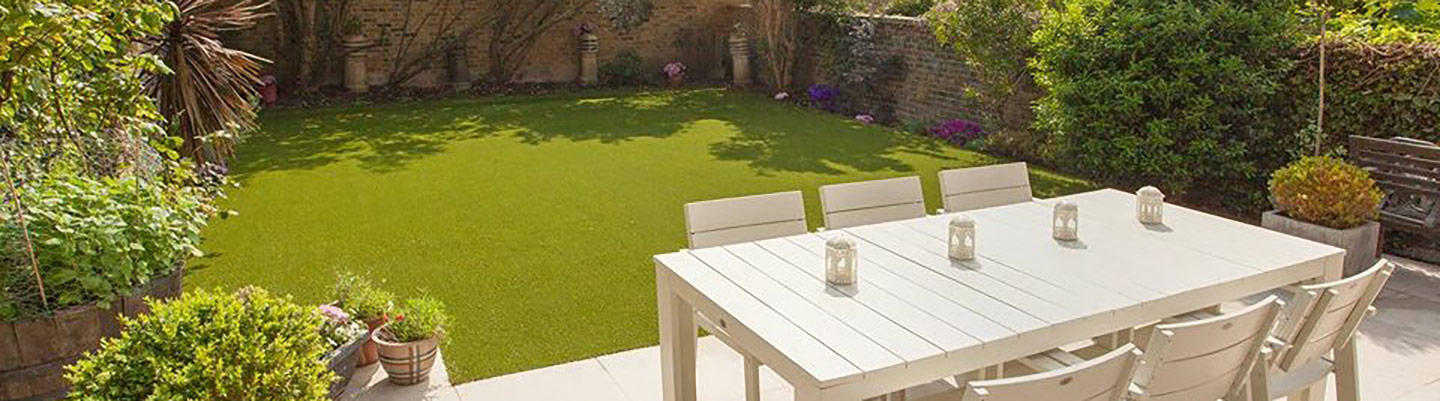
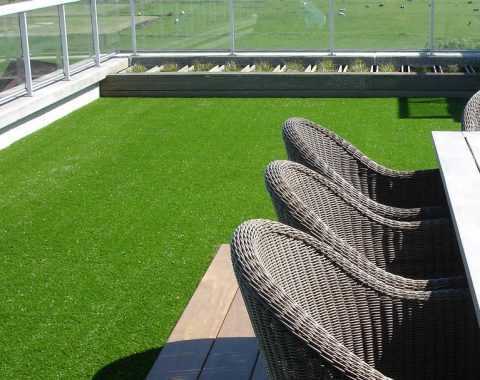
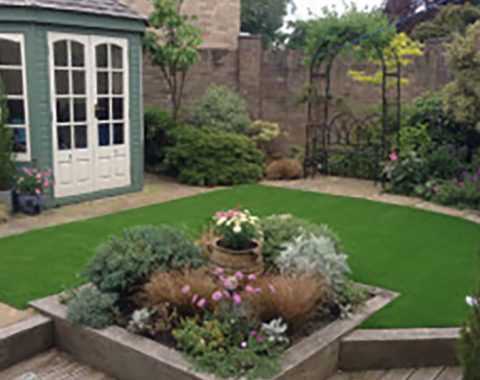
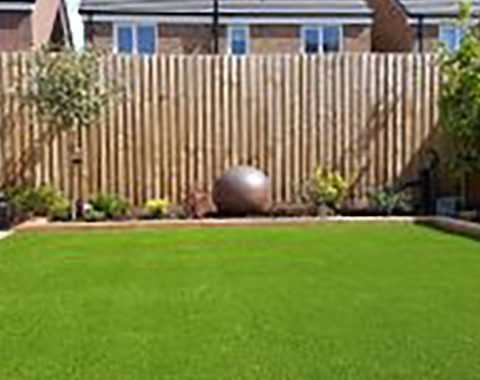
If you want easy upkeep without compromising on your green spaces, why not try artificial grass?

You and the kids have a perfect lawn all year round with no mud, mess or mowing!

fake grass in garden with flower bedding

Bring the inside, outside.


Having shared spaces to socialise is important for friends and family. With housing shrinking year on year, these communal areas are compromised for storage space. Investing time and thought into planning your garden can provide you with a whole new social space. By adding French doors, you can create a seamless transition between your indoor and outdoor space, creating a whole new living space.
bright green artificial grass in garden with timber fencing

Get creative with space.


Even the smallest gardens have great potential. There may be more space to work with than you initially realise. Even old decking, tarmac or concrete can be turned into a luscious lawn with artificial turf. If you enjoy gardening, but don’t have the room for a full flower bed, add some plant pots. What about your vertical space? Climbing plants on a trellis create a beautiful natural look.
Artificial grass and garden gazebo

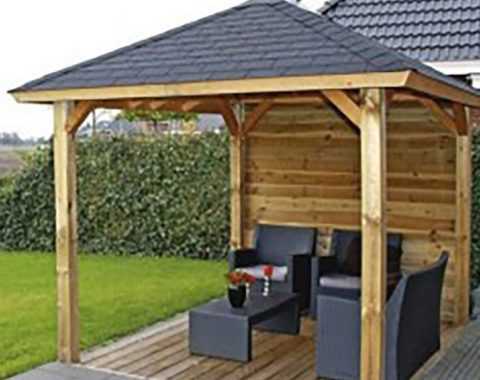
Shelter from the elements.
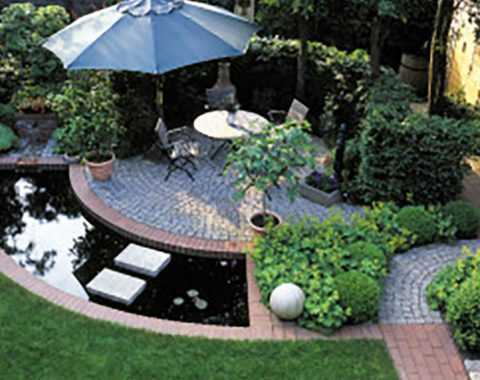

So you have a perfect lawn and beautiful garden furniture but the Great British weather is stopping you from setting foot outside. Make sure you add some sheltered areas that allow you to enjoy your garden all year round. This can be anything from an awning to a full gazebo. This creates a fantastic space to kick back and relax or entertain and socialise.
artificial grass next to pond and paved dining area

Add focal features.


Garden features can add a lot of interest to the overall design. From simple to complex, there are options for all styles and budgets. For example, a smaller garden would look great with a rockery, as they are easy to fit on slopes or rough ground. If you have a large space, a water feature such as a pond or fountain can be enjoyed by all the family.
Fire Pit surrounded by benches

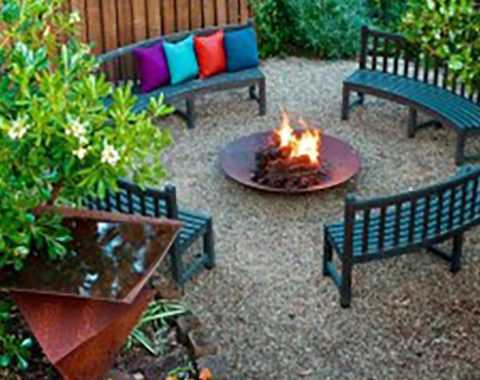
Heat things up with a fire pit.


Fire pits are one of the most popular outdoor living designs trends at the moment. They add a unique, social and relaxing atmosphere to any outdoor space. There are many styles to choose from, including in-ground and above ground as well as decorative paving to line the exterior.These pits add a key focal point to your garden to stunning effect. Whatever your choice regarding designs, you’re sure to enjoy many hours of conversation around this season’s hottest design trend.
Pizza Oven in sunny garden

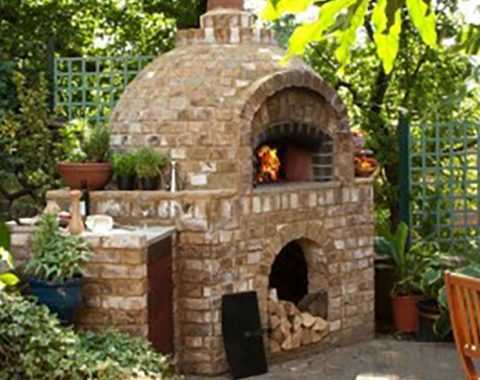
Create an al fresco kitchen.


Another emerging outdoor trend is the addition of a wood fire oven. From home fired pizza to meat stews and slow roasted meats, you can create restaurant standard dishes in your back garden. They can also be stunning additions to an outdoor space, providing a visual centrepiece for an alfresco kitchen.Although it can be an expensive installation, there are many resources and guides available for a DIY oven if you’re up to the challenge.

However you choose to enhance your outdoor space, some careful planning and design will create a haven that you can enjoy all year round

Posted on

10 Step Guide to Creating A Garden Putting Green

Namgrass Artificial Grass Golf Surface

10 Step Guide to Creating A Garden Putting Green

Whether you’re a pro in training, or just like to hit the golf club on the weekend, I’m sure you’ve dreamt of having a putting green right outside your house. By following our step-by-step guide, that dream can become reality. Artificial turf will give you year round perfect putting; and all in your back garden – bliss! Before you get started, take a look at our video on how to install artificial turf. This will give you an overall idea of the process before you get going on our step-by-step guide to creating a unique putting green.

TOOLS NEEDED

  • Sod Cutter
  • Compacter
  • Round tip and flat shovels
  • Large rake
  • Hard bristle broom
  • Wheelbarrow
  • Concrete trowel
  • Utility knife
  • Spray paint

LAWN LAYOUT AND GROUND PREPARATION

Step 1 – Choosing the design

  • First of all, you need to map out your putting green.
  • Take some rope and lay it down roughly to create the design.
  • When you have the size and shape mapped out, have a little practice to see if it works for you.
  • Use spray paint to mark the entire outside perimeter of the shape. This will be used as the perimeter for your basing and edging.

Step 2 – Preparing the ground

  • Now you have your shape laid out, it’s time to remove the existing turf.
  • Hiring a sod cutter will make this a lot easier, and will allow for a more even surface than a shovel.
  • Once the old grass is gone, we recommend compacting the damp soil using a plate compactor to ensure a solid foundation for the crushed stone base.

Step 3 – Edging

  • Add an edging as a border along the entire outside perimeter of your putting green.
  • This will stop the base material from going outside of the area desired.
  • Our artificial grass comes in varying pile heights. Your edging needs to account for this.

BASE INSTALLATION

Step 4 – Add your base

  • Now you have edged your design, it’s time to lay the base material (for example, ‘Grano dust’).
  • Take your design and measurements to your local building suppliers and they will help you with this.
  • Make sure to distribute the material evenly. Use a large rake spread out the base so that it even and flat.
  • Now compact.
  • Follow this process until you have a layer between 40-60mm deep, with a 20mm between the base and the edging.
  • Lay out the weed membrane across the base and cut it to fit around your edging.

Step 5 – Install the cups

  • Arrange the cups on the base.
  • Mark the place where the cup will be by pressing it into the surface.
  • Using a small hand shovel, dig a hole that is at least 2 inch larger around than the cup than and deep enough to fit the cup (leave 1 inch of the cup exposed).
  • Add fast drying concrete mix powder around the cup and add water until the mix is saturated.
  • Run the compactor over the cup. This will make it level with the top of the base.

TURF INSTALLATION

Before installing your turf, unroll it and lay it out flat on top of the base to let it relax from being rolled up. It is likely that you will need to join pieces together to achieve your design.

Step 6 – Cutting

  • Lay out your grass, in the shape of your design (with any curves carefully marked out).
  • Identify the third and fourth rows of stitching.
  • Using a sharp utility knife, cut along the latex layer in between the rows.
  • Repeat this along the edge of the joining length.

Step 7 – Joining the lengths

It is essential that you get this bit right to achieve a perfect putting green. Check out our easy to follow video to help you:

  • Align the cut lengths of grass and fold back the edges.
  • Lay the joining tape out flat between the two lengths.
  • Use a glue gun to apply the adhesive along the edge of the tape.
  • Gently fold the lengths over so they stick securely.
  • Press the sides down by walking along the entire length.

Step 8 – Add the infill

  • To help settle the grass and improve drainage, we recommend you fill it with a layer of kiln-dried sand.
  • We recommend around 5 kilos per square metre.
  • After spreading the sand, brush the grass with a stiff broom to lift up the fibres,

 Step 9 – Cut the holes

  • Locate the cup hole under the turf.
  • Using a utility knife (with another new blade!), carefully cut the holes out of the turf.
  • Trim any loose fibres carefully with scissors.

Step 10 – Enjoy

Phew! Now your personal putting green is ready for action. Enjoy a few test shots (if you have any energy left!). Want all the benefits without the hard work? We can do it for you! Contact one of our installers and we’ll be happy to assist you from design to fitting.