Posted on

How to Lay an Artificial Grass Roof

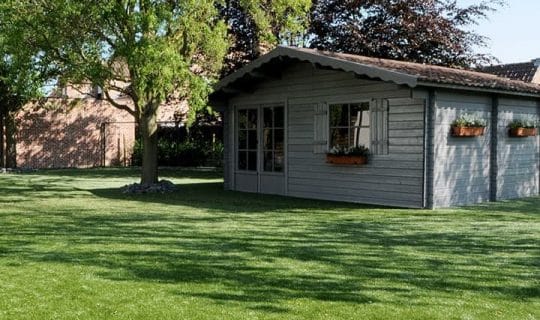
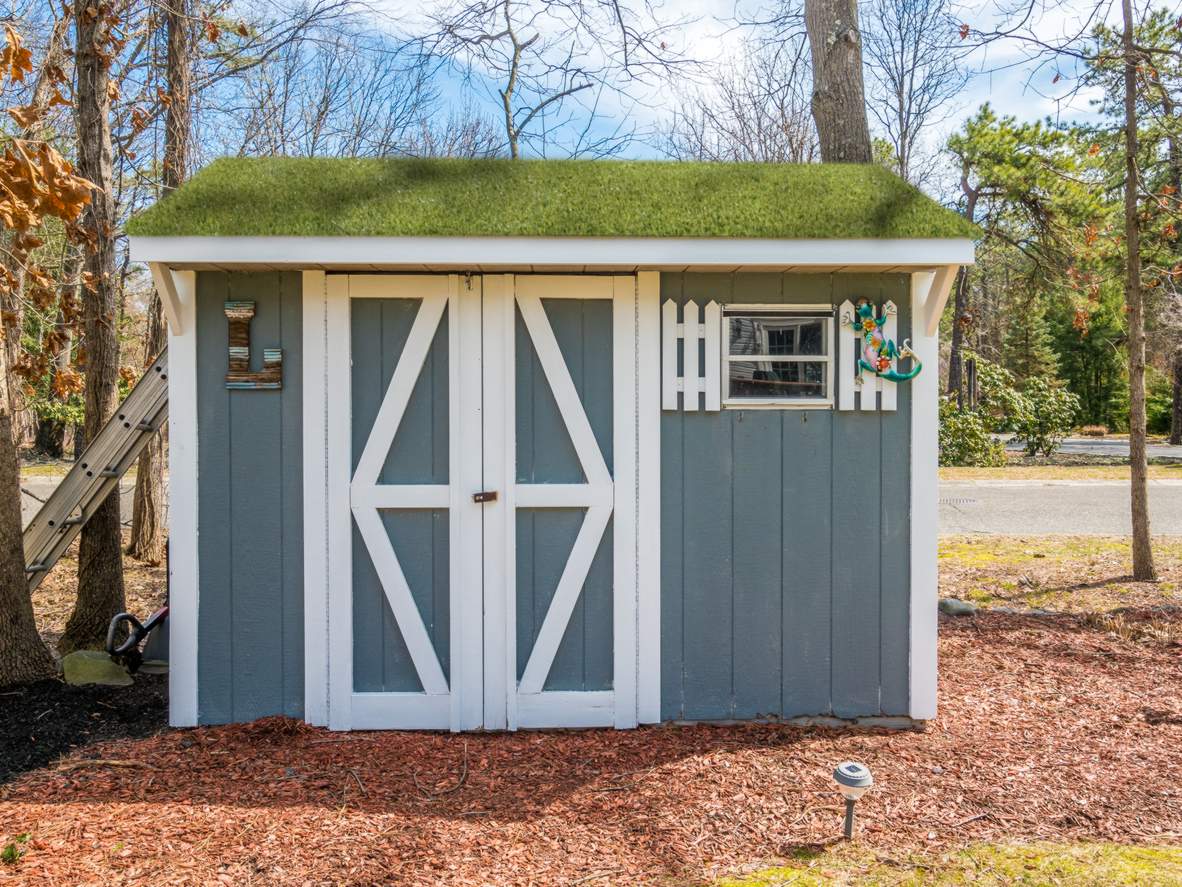
How to Install an Artificial Grass Roof

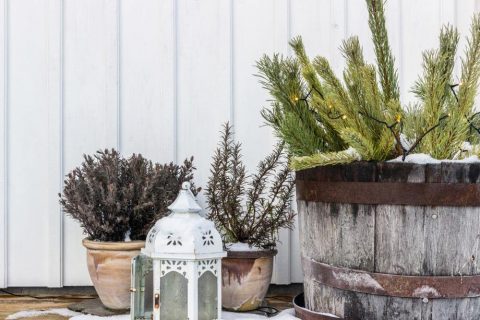
Adding artificial grass to a flat roof is a great way to make sheds, garages, and outbuildings look brighter and more at home in the garden. Whether you’re covering up a felt roof, commonly used on sheds, or want to update a roof terrace or balcony, you’ll get the best results if you follow our installer’s guide to creating an artificial grass roof.  

What You Need

garden shed on fake grass with leafy trees

To install an artificial grass roof, you need:

  • A measuring tape
  • A sharp utility knife
  • Joining tape (if multiple pieces of grass are to be joined)
  • Artificial grass adhesive & a cartridge gun
  • Underlay or shockpad if working with an uneven surface.

Once you have your equipment together, you need to choose, measure up, and order your artificial grass ahead of installation day. Many builders’ merchants and garden centres can sell you artificial grass, and you can use our stockist finder to find your nearest Namgrass retailer.

To calculate the amount of artificial turf you’ll need to order for your green roof, measure the length and width of the roof and multiply the two numbers to get the total surface area. Divide this number by the width of the artificial grass you have selected to find the minimum length you need to order to cover this area.

Make sure you allow at least 10cm excess in each direction to ensure a good fit and easy installation, or you may struggle to get a professional finish. For example: if your chosen artificial turf is cut from 2m wide rolls, covering a 10m­roof would require approximately 5.2m of grass to allow for 10cm of excess in each direction.

Laying an Artificial Turf Roof

Once you have your tools and artificial grass ready, you can start installing your artificial grass roof:

1 – Ensure the roof you plan to cover is structurally sound, and in good condition. Check to make sure it’s not cracked or affected by rot, otherwise you may damage your roof further during installation.

2 – If your roof is uneven, slatted, or tiled, installing a layer of board, shockpad, or underlay can level out the surface to create an even finish.

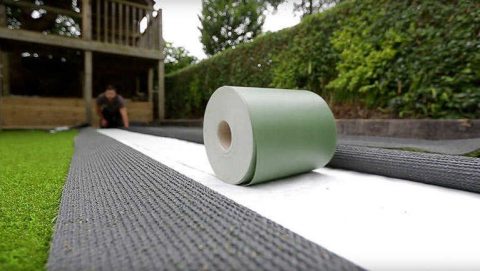
3 – Work out where you need to cut your artificial grass to cover the full roof, ideally on a piece of paper before you start cutting. Only once you’re confident you’ve got this right should you start cutting the turf to size before placing it in situ. When cutting artificial grass, be sure to cut along the lines of drainage holes in the backing material, or your grass may begin to unravel.

4 – Once you’re satisfied with the fit, fold your grass back along the edges where any pieces meet each other, so that there is a gap between the two pieces of grass and the black backing material is facing up along both pieces of turf.

5 – Roll a strip of joining tape out along the full length of the join between the two pieces of grass, with the shiny side down and sticky side up. Apply a thin layer of artificial grass adhesive along the length of the tape, and fold the grass back down, fixing the black backing firmly to the glue and tape.

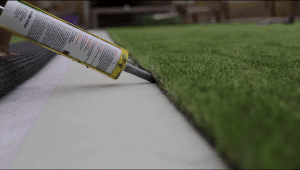
6 – When you’re happy with the fit and position of your artificial grass, and all the joins between each piece are secure, roll your turf up to one end and lay an even bead of artificial grass adhesive around the perimeter of the roof.

7 – Unroll your artificial turf carefully, making sure the edges lines up properly with your original fit. Lift the edge you rolled the grass away from up and apply a bead of adhesive along this edge and press your turf back into position.

8 – Once the adhesive has dried and your turf is firmly secured, give it a quick brush over with a bristle brush to raise the pile and lift any flattened grass.

joint tape rolled out to join artificial grass
glueing artificial grass with glue gun

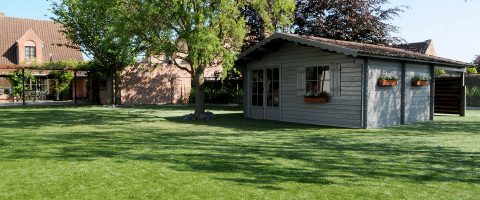
After a few hours, your artificial grass roof will be firmly secured in place and looking fresh, green, and natural. Now you can relax and enjoy your handiwork, without the added fuss of maintaining a natural green roof.

Posted on

How to Make the Most of Your Garden in Autumn and Winter

How to Make the Most of Your Garden in Autumn and Winter

Not ready to hang up your garden tools and venture indoors? These 5 tips will keep you enjoying your garden late into the year.

Preparation

Autumn inevitably brings slower activity in the garden, but if you want your garden to flourish come spring, you need to invest in preparation.

Here are a few useful tips to get you started:

1. Start by cleaning away rotting and finished plants. This will not only prevent pests from returning to your garden in spring, but it will also improve your soil health.

2. Think forward to the colourful garden you want by spring and start planting bulbs accordingly. Tulips are a great choice as they need to be planted in cool soil, or plant daffodils in pots to enjoy come early spring.

3. Give your tools and patio furniture some TLC. Start with a thorough clean before applying treatments and storing in a cool, dry environment. Taking this step will not only prolong the life of your tools and furniture, but it will also save you time come spring.

For more gardening to-do lists for each month of the year, take a look at our blog post.

Walking in a Winter Wonderland

Autumn and winter provide the perfect opportunity to get festive in the garden.

Spend autumn collecting acorns and pine cones to turn into winter wreaths. With the addition of cinnamon sticks you’ll smell Christmas before you’ve even entered your home! Use this autumn and winter period to be bold and turn your garden into a grotto or adopt more subtle touches to add festive spirit.

A winter garden would be incomplete without lighting. Dig out your outdoor lights, drape them over your home or over your shed. For a truly whimsical look, delicately place them in trees and topiary. For the Christmas enthusiasts among you, investing in lighted decorations like sleighs and reindeers bring festive fun to your garden. Subtle touches such as lanterns placed around your garden give a festive yet sophisticated look.

Light my Fire

Extend the outdoor season for a while longer with a new fire pit.

Not just a useful addition to the garden that can be enjoyed all year round, the countless design options mean you are sure to find a firepit to complement your garden. Equally beautiful in design and function, chimeneas make the perfect focal point to your garden during the autumn/winter season.

Spend the crisp nights snuggled under blankets with friends and family, indulging your inner child toasting marshmallows on the firepit! Wood stores also make a great feature to a garden, bringing texture and colour to your outdoor space. Fill to the brim with multiple-sized logs and kindling.

Renew your Winter Pots

Are you fed up of your plant pots looking sad and bare during winter? Then fear not, we have some helpful tips to revitalise your planters and inject some life back into your garden.

Trusty evergreen plants are a staple in providing some contrasting colour to the silvery tones that transform your garden through the winter period. You can even recreate your favourite winter scents in your garden with shrubs such as ‘Christmas box’ (sarcococca confusa), which will fill your garden with glorious sweet notes.

Evergreen plants are also a perfect low-maintenance option, so you can reduce your time spent tending to the garden. Planting grasses can bring movement and drama, making sure your garden doesn’t feel static or boring. Be sure to choose hardy succulents and shrubs when renewing your plant pots, as they will need to withstand the harsh British winter!

For a more in depth read on how to inject some colour into your garden, take a look at our blog post on autumn plants here.

Help the Wee Beasties

Do your part for the environment by providing refuge for your local wildlife.

It can be as simple as brushing leaves and debris into borders to create warm burrowing habitats for hedgehogs and insects. Take it a step further and treat your garden animals to some luxury with wooden insect houses and seed balls for your winter red robins. You’ll reap the benefits in summer when these helpful insects make an appearance in your garden!

Bring the family together to build insect ‘hotels’ and birdhouses to place around your garden. This will make the perfect opportunity to have your own Attenborough moment, identifying bugs with the children and bird-watching from your home. Get the blankets out and admire the natural wildlife as it finds a home in your garden!

For more tips on encouraging wildlife into your garden, read our blog post here.

Autumn and winter might not necessarily be time that you’d think to spend in the garden, but with these ideas we hope you will!